

INDIGO FARMING AND EXTRACTION
In India alone, sixty species of Indigofera are known. The genus is most diverse in Peninsular India followed by the Himalayas. The most important indigo yielding species of India include Indigofera Arrecta, Indigofera Coerulea, Indigofera Longiracemosa, Indigofera Suffruticosa and Indigofera Tinctoria. The Suffruticosa is exclusively confined to the North-Eastern states along with Andaman & Nicobar, whereas Longiracemosa is confined to the southern states. Arrecta can be widely found in Bihar, West Bengal, Karnataka, Uttar Pradesh and Andaman & Nicobar. Besides, Coerulea is present all across ranging from the Deccan Plateau, Northern Plains to the North-West along with Sikkim and Andaman & Nicobar. Lastly, the most popular one, Tinctoria is present all throughout the subcontinent.


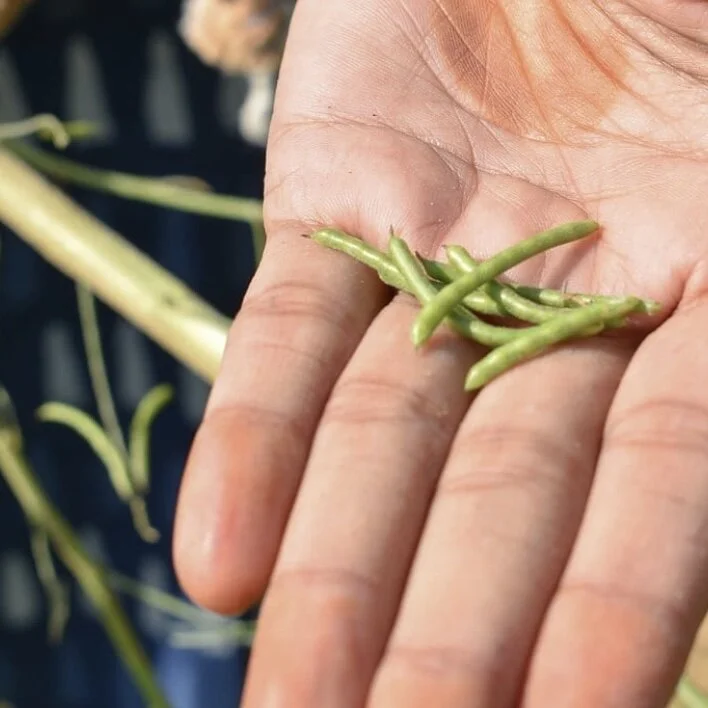
The indigo crop in general is tolerant enough to grow successfully almost anywhere between sea level and five thousand feet, where there is sufficient warmth and water. Indigo is a tropical crop but it can also be grown in temperate areas. The crop needs to be protected from excessive rainfall, water logging and hailstorms. Although climate and conditions are expected to be most ideal, however to produce top quality dye there is required constant vigilance at every stage by avoid any flooding and weeding apart from sowing best variety of seeds. Being perennial in nature, plants of all varieties yield the dye at least thrice a year. To start another cycle, sowing is also conveniently possible as the seeds can be obtained from the last harvest by letting few plants to bloom flowers that turn to seed bearing beans, that can be dried to obtain seeds. No fertiliser is used in indigo fields, as this plant belongs to the legume family and captures atmospheric nitrogen for its growth. This is true in the case of most species, especially Indigofera.

Indigo beans that contain the seeds

Indigo seeds

Soaking of Indigo seeds overnight
SEEDING THE INDIGO CROP
Indigo seeds, soaked overnight to initiate the germination process are set into troughs or directly into well tilled earth, prepared in a nourishing combination of fresh soil, peat and cow dung.


Watered diligently, the seeds begin to show signs of sprouting in a few days. The crop requires instinctive and attentive care of regular de-weeding to ensure the saplings are not over-run by wild grass and weeds. The crop is estimated to grow to its harvest-ready height in 90 days.
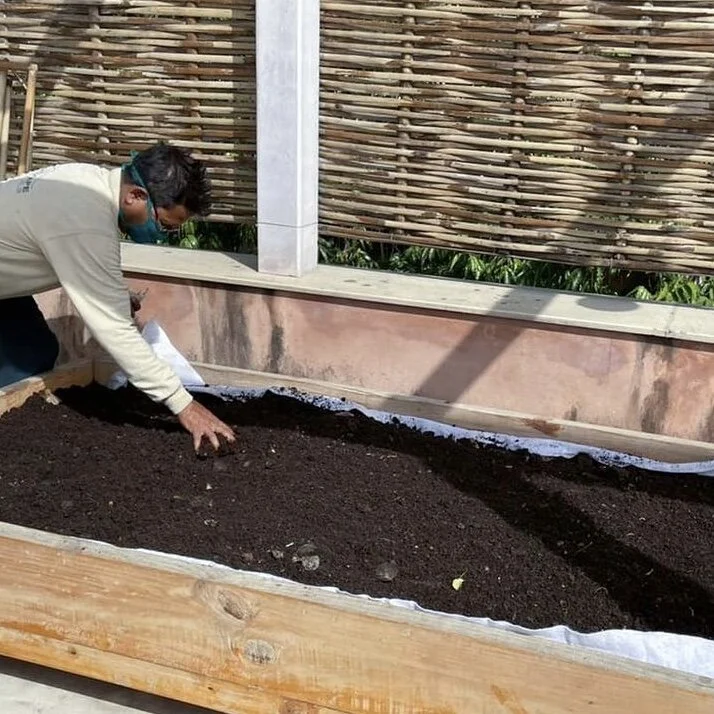
Hand tilling the soil in the troughs on the Nila House terrace

Shoots sprouting within a week of sowing seeds

Update on day 12
HARVEST
The first harvest is after 90 days of sowing. The plants in the first harvest are smaller in comparison to the second and third harvest and are cut about 10 cms above the ground to allow for re-growth.


In another 90 days, the plants are tall enough for a second harvest. It's only in the second harvest the seeds start to sprout.


Indigo dye is extracted from freshly harvested plants through fermentation and oxidation. As soon as the plants are cut, they are brought to the processing centre and processed immediately thereafter.


The use of electricity or chemicals are not involved in the process and this produces a pure form of Indigo dye extracted in an eco-friendly manner.


After the second harvest, crops such as groundnuts or corn are grown following the crop rotation process so as to increase soil fertility and yield better crop.


Same cycle is repeated the following year.
Some of the indigo plants are left to flower to collect seeds to be planted the following year.


SOAKING THE INDIGO CROP
Steeping of the indigo plants in water to initiate the fermentation process
The plants are put inside water tanks or large tubs without delay and spread out evenly. It is crucial to add them in within a 2 hour window or else they start to dry up (bigger crops are usually harvested and soaked early morning, to skip the mid-day heat).


Iron rods, wooden logs, stone weights are set aside to press down on the indigo leaves to coax the extraction process to eventually form pigment. The bigger bundles are placed at the bottom of the tank, followed by the smaller batch. The stone weights are carefully placed on the bundle pile, ensuring the weight is evenly distributed.


The tank is then filled with regular water, up to 6 inches above the height of the indigo bundle, ensuring they are completely immersed. On testing the pH of the water is to be fairly neutral. The indigo bundles are left to soak for the next 24 hours or more depending on the region and climatic conditions.
Plants in temperate regions are to be soaked for 3-5 days and for 1 day in tropical regions.


EXTRACTION PROCESS – OXIDISATION
The fermented indigo leaves, are gently taken out. The nitrogen-rich plant waste is set aside and used as nutritious fertilizer for the next crop. A strainer is used to sieve out the excess liquid instead of squeezing or pressing down on the plant mass.
Traces of colour is visible in the liquid left behind – a fresh, green liquid with an iridescent film of purple-blue froth lightly sitting on the top. The liquid is ready for the next step of oxidization.
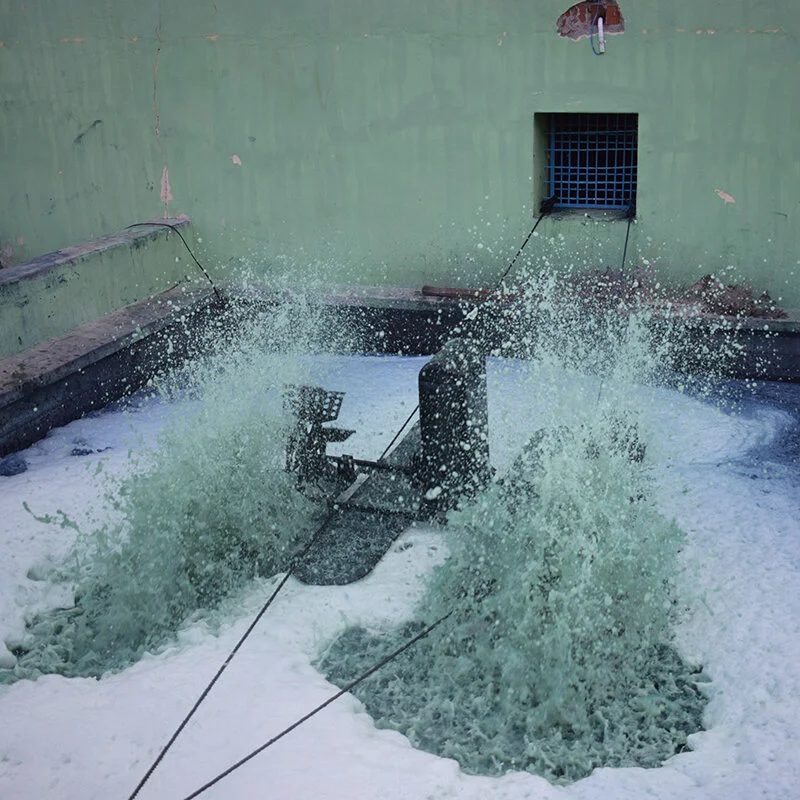
A lime water mix, with the lime (Ca (OH)2) added in proportion of 1% of the weight of the total crop is prepared and added to the container, changing the pH to 10.2. To aid the oxidization process, the liquid needs to be whisked. The process of oxidization starts when the water is churned vigorously using a wooden wheel or cane basket for an hour or more if needed.
Once the green water turns blue, the churning is stopped and the oxidized water rests overnight.
The actual colouring matter, indigotin, is present in the leaves in the form of a glucoside (Indican), which is hydrolysed due to the action of an enzyme indimulsion in the presence of dilute acids and alkalis.
Hydrolysis leads to the formation of indoxyl and glycose. The indoxyl is further oxidised while beating the indigotin.
The foam which is agitated is collected using a cloth and thrown outside the container.
The oxidation is complete when a sample of liquid that is allowed to settle yields a reddish brown liquid layer on top with a settled layer of indigo pigment at the bottom. By this point, foam may have stopped turning blue or disappeared.
The lemon green indigo water turns to a bright blue-green with the oxidization and the light bubbles turn frothier, like sea foam. This liquid is left undisturbed for 24 hours, to allow the indigo to settle.


DISTILLATION
Commercially, the treatment of precipitating and separating the colour and preparation of the commercial dye cake or powder is carried out through boiling.
The bottom layer of sediment is released into a smaller tank through the dual valved tank and transferred into a copper vessel and boiled continuously for 1 – 2 hours. The process is fuelled by natural waste - cut off branches of trees.
After boiling, the sediments are filtered using a fine cloth making it easy for filtration.
The consistency of the sediment now starts to resemble blue jam.
The jam rests in a tank. It is then filled in molds and pressed to remove excess water using a simple, hand operated pressing machine.
Once the water is removed, the slab rests on a flat surface where it is cut into small cakes using a knife.
These cakes are then dried in shade for 3-5 days depending on the temperature.
The cakes can be crumbled up further into beautiful deep blue powder.


After the 24-hour rest period, the indigo sediments settle at the bottom of the tub, with a liquid fully oxidized. A muslin cloth is placed on the mouth of a second tub. Without agitating the liquid in the first tub, the indigo liquid is poured from tub 1 to tub 2, with the muslin cloth acting as a slow sieve. Once the bottom of tub 1 is reached, the liquid seems denser and viscous, which when gently poured out, leaves behind a rich residue on the cloth.
Once the liquid has completely seeped through the muslin cloth, what is left behind is a rich paste of the deepest indigo – the ‘blue gold’, ready to be gently scrapped off and collected.
The paste of pure indigo collected needs to be stored carefully. Unlike indigo powder or blocks, indigo paste is vulnerable to mould and needs to be stored in an air tight containers, refrigerated or used immediately in a live vat.